How To Do A Pull Up
The pull up is one of the greatest feats of relative strength. If you can pull your own body weight, you’ll have a strong back, defined arms, and a strong core. You’ll also feel like a badass!
In my opinion, pull ups are the best bodyweight exercise you can do and they’re up there with the most effective exercises of any kind. Here's how to do a pull up.
Before I go on, I want to quickly address the misconception that women can’t do pull ups. We can!
It took me a while to build up the strength and skill (using the exercises in this article) but I can do pull ups, and so can a lot of other women. Pull ups are tough, but they’re not impossible. Everyone can achieve this awesome skill, it’s just a matter of practice, persistence, and progressions.
How To Do a Pull Up:
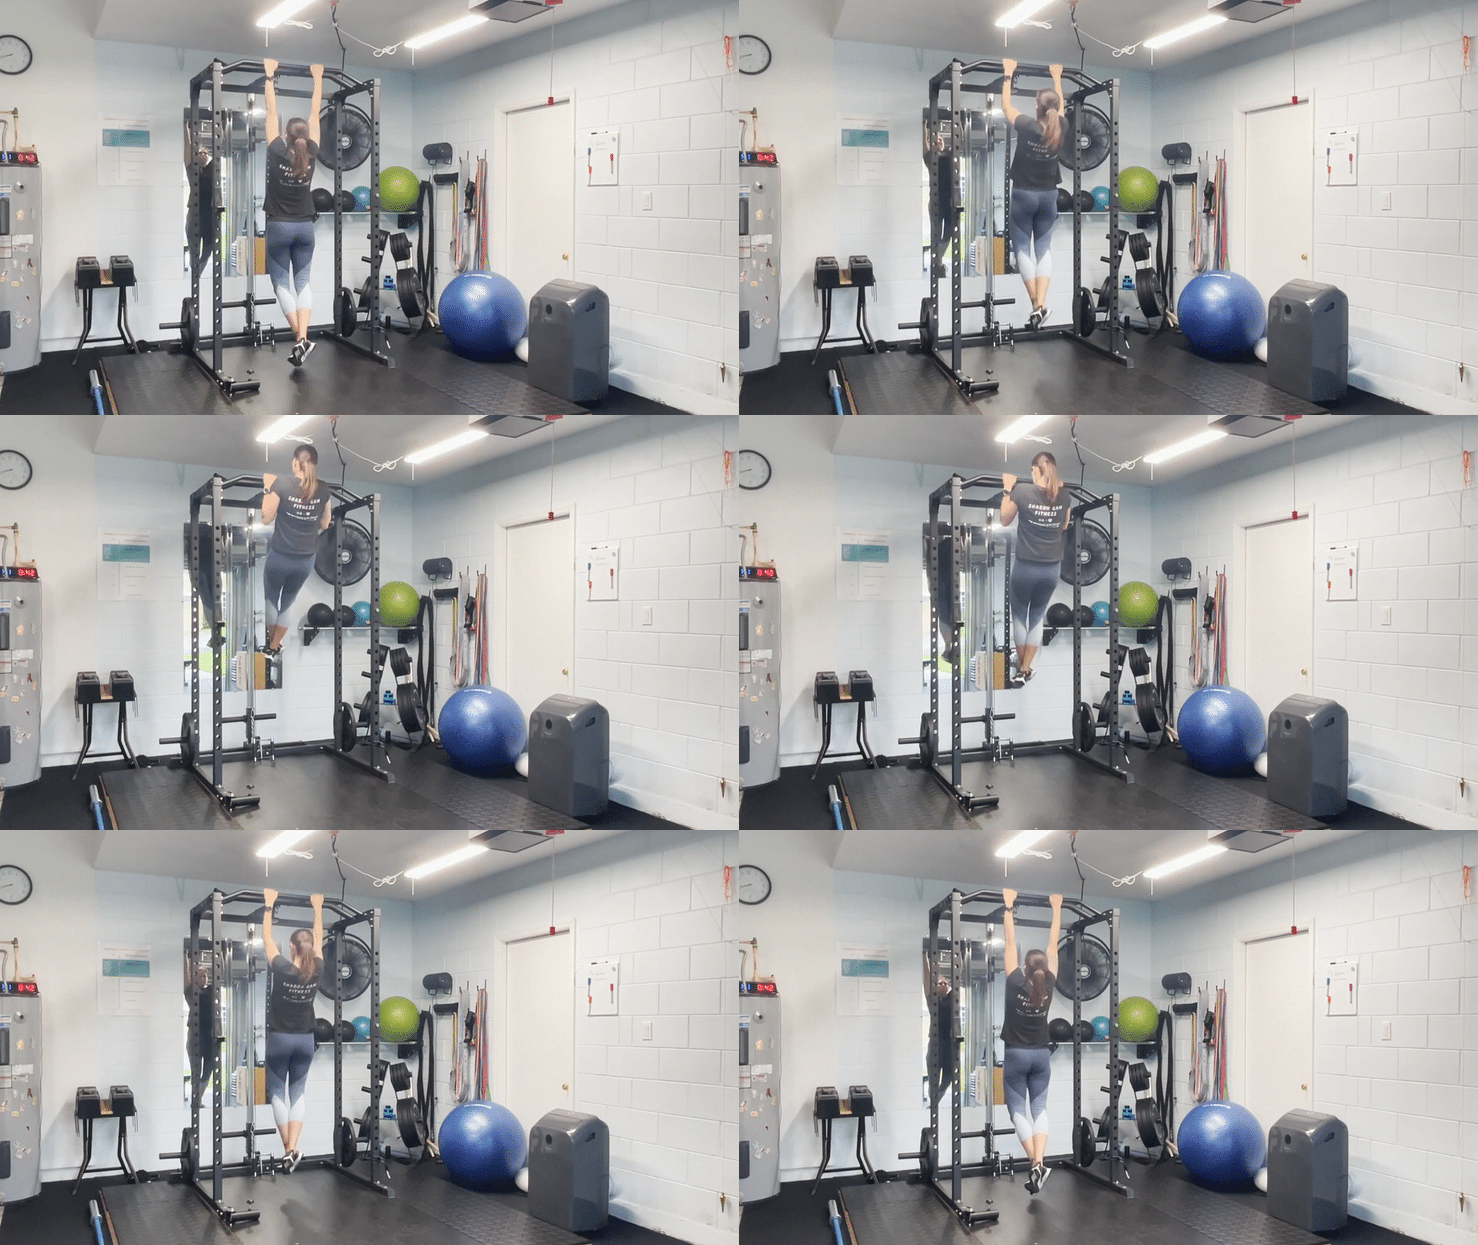
Grab a bar with an overhand grip (palms facing away from you). The farther apart your hands are, the harder the exercise will be, so don’t go too wide. I recommend putting your hands slightly wider than shoulder width apart.
Hang from the bar with your arms fully extended (elbows straight). This is called a dead-hang.
Pull your shoulder blades slightly down and back. Activate your core by tilting your belly button towards your head and slightly lifting your thighs.
Unlike a dead-hang, this is an active position in which your muscles are tense. Training in this position strengthens your core and prevents swinging.
Pull yourself up until your chin is above the bar. Think about pulling your elbows down and back. Your entire body should move as one solid unit without flailing your legs, straining your neck to get your chin up, or swinging your body. Pause at the top for a moment.
Lower yourself back down in a slow and controlled manner. Again, avoid swinging and don’t allow yourself to drop down. Keep lowering yourself until your arms reach full extension and your elbows are straight.
The Difference Between A Chin Up And A Pull Up
A chin up is almost exactly the same as a pull up, except that you grip the bar underhand, with your palms facing your body.
Chin ups are a little easier than pull ups because the underhand grip lets your biceps help more than they do when you use an overhand grip.
If you’re building up your strength, you can adjust any of the following exercises to an underhand grip to make it a little easier.
How To Train For Pull Ups
Here’s how to build the strength and movement patterns for pull ups. It might take a while to work your way up to a full pull up, but if you progress persistently through these exercises, you’ll get there.
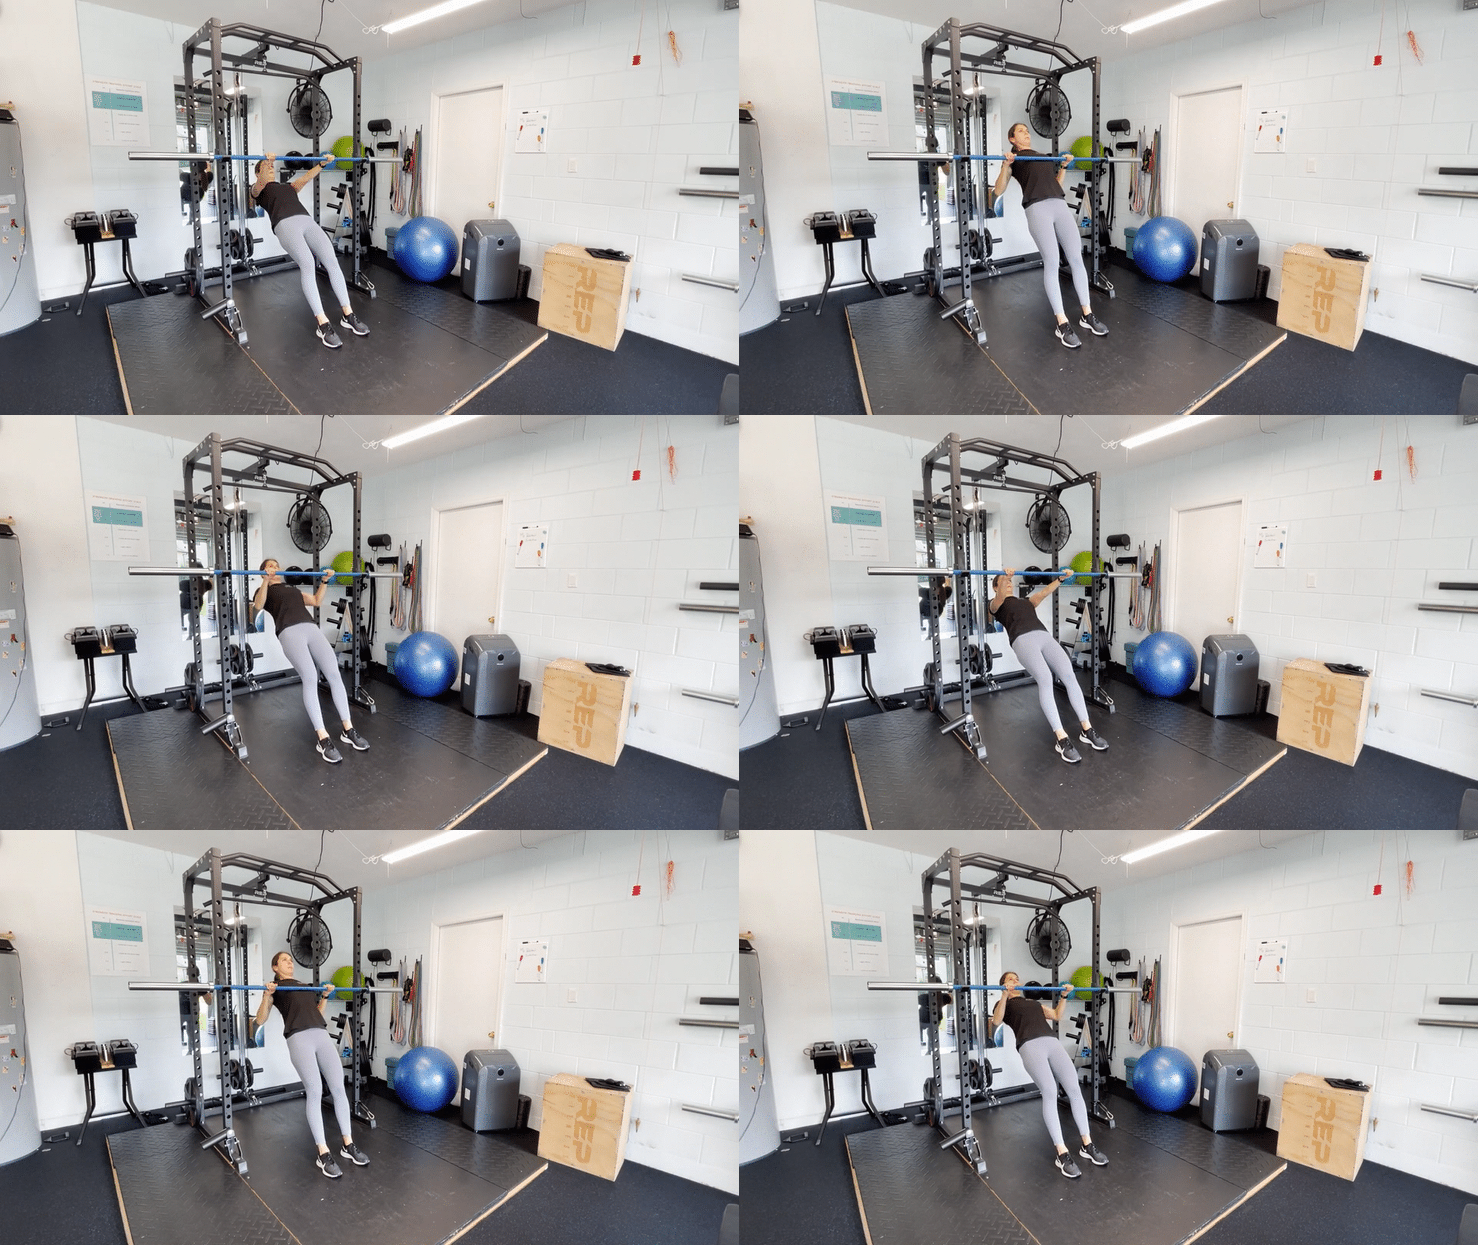
Horizontal Row:
These are also sometimes called “inverted rows”.
Use a power rack or a smith machine so you can adjust the height of the bar. You can also use a suspension trainer or, if you’re working out at home, the edge of a sturdy table or a broomstick laid across two sturdy chairs.
I recommend starting with the bar around chest level. This is usually easy enough for most people and lets you build some confidence in pulling your body up before you move the bar down to a more difficult position.
Get under the bar, facing upwards. Grab the bar with an overhand grip, hands about shoulder width apart.
You’ll have to play around with your leg position a little. You want to find a position where the middle of your chest will touch the bar when you pull yourself up. Depending on the angle, you might be able to keep your legs fully straight and rest your weight on the edge of your heels, or you might have to bend your knees a little and put your feet flat on the floor so they don’t slip.
Extend your arms so they’re completely straight. Brace your core by pointing your belly button towards your head.
Pull yourself up to the bar by pulling your elbows back and down. Your body should move up towards the bar as one solid unit, with your hips rising at the same time as your shoulders.
Pause at the top for a moment before lowering yourself, slowly and under control, back to the starting position (arms completely extended).
Aim for 8-12 solid repetitions. Once you can perform 12 repetitions consistently with good form, lower the bar towards the floor to make the exercise more difficult. Repeat until you can do 12 reps with the bar at waist level or lower. Once you can do that, you’re ready to move up to the pull up bar.
How Will This Help?
Since your feet are on the floor and you’re leaning back at an angle, the horizontal row is easier to do while building strength in the same muscle groups that you need for pull ups. It also improves your grip strength and gives you confidence that you can pull your body weight.
As you get stronger, lowering the height of the bar makes the exercise more difficult so you can keep building the strength you need to transition to full pull ups.
Negative Pull Up:
To do a negative pull up, use your legs to jump up to the top position, with your chin above the bar. Brace your core and slightly raise your legs as described in the standard pull up.
Pause for a few seconds, then slowly lower yourself down, under control, until you reach full arm extension. Make sure you keep your whole body tense, don’t just let yourself drop down. It should take you at least 4-5 seconds to lower yourself all the way down.
Jump up to the top position again and repeat. Do as many repetitions as you can with good form, working up to 8-12 quality repetitions.
How Will This Help?
See my article on push ups for details of the value of negatives. Basically, you’re stronger during the lowering part of any exercise, which is also called the “negative” part. In the case of pull ups, that’s when you fight gravity to lower yourself to the bottom position.
Focusing on that portion of the exercise and using some help from your legs to get back up to the bar can help you build strength, until you’re ready to do the full movement.
Resistance Band Pull Up:
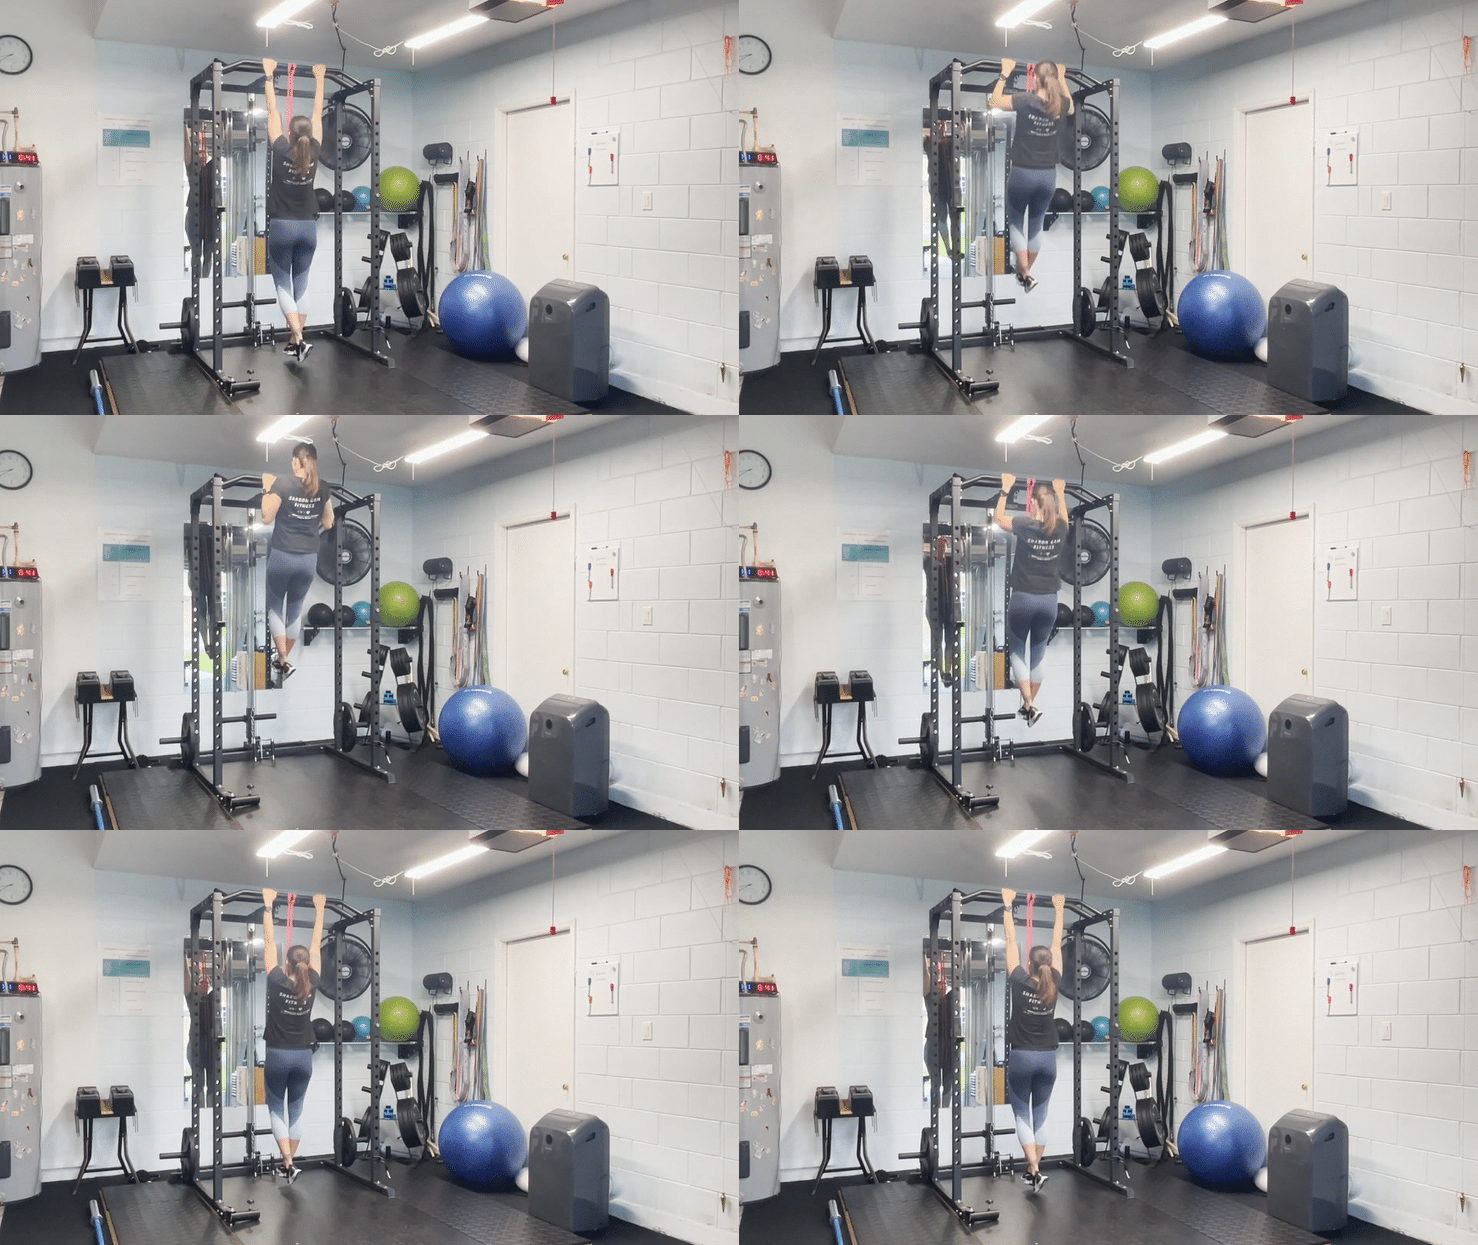
Use a set of large resistance bands to take some of your body weight and make pull ups easier. These bands are usually 41 inches long and come in a variety of resistance. Many gyms have these bands, or you can buy yourself a set for around $100.
Loop a band around the bar. The stronger the band’s resistance (the thicker bands are stronger), the easier the pull up will be. At first, it’s a good idea to use the strongest resistance band you have, so you can build confidence in the full movement. As you get stronger, you’ll be able to use lighter bands.
Put one foot in the band and lock that leg. Grab the bar and do your pull ups, making sure to keep your body tense and lowering yourself under control. Aim for 8-12 reps.
When you can complete 12 solid reps, start using a lighter band. Since it will be more difficult, you’ll have to decrease the number of reps. Work your way back up to 12 and repeat this process until you’re using the lightest band.
Other Types Of Assisted Pull Ups:
Partner assisted: Have a partner stand behind you and gently push you up with their hands at about the level of your lower ribs. They should only give you the minimal amount of help you need to get your chin above the bar, you should be doing most of the work. Lower yourself down slowly and under control, then have your partner help you get back to the top position again.
Chair assisted: Place a sturdy chair (or any sturdy structure) under the bar. Put one leg on the back of the chair and use your leg to help push yourself up. Use only enough assistance as is absolutely necessary to get your chin above the bar, then lower yourself under control. Using the chair changes the movement pattern and your body position, so I only recommended this if you don’t have a partner or resistance band.
How Will This Help?
You might think that the only thing stopping you from nailing a pull up is the strength of your muscles. That’s actually only part of it. Your brain’s coordination of the movement pattern is just as important.
Pull ups use many different muscles at once, and your brain has to learn how to coordinate them effectively. Each muscle needs to work with the others, firing in the right sequence and at the right level of force to get your chin above the bar.
The big muscles in your back need to contract hard to do most of the heavy lifting, but the smaller muscles in your back, arms, and shoulders also need to activate at varying levels and times to help with the movement.
Your core muscles need to stay active at a steady level to keep you stable, and other muscles actually need to relax so they don’t get in the way. Your brain needs to send the right neural signals, at the right times, to make all of this happen, and it’s a remarkably complicated thing to do.
It’s important to replicate the full movement to give your brain, nervous system, and muscles the practice they need to get it right. A resistance band or a partner gently pushing you up gives you enough assistance to be able to practice the full movement, even if your strength isn’t quite there yet.
Putting It Together
Pull ups are a skill, and like any other skill you need to practice them often to get better.
Start by practicing horizontal rows at least 2-3 times per week to build a base level of pulling strength. Aim to do just one more rep in at least one set per workout, and lower the bar towards the ground as your strength improves.
Once you can do 12 solid horizontal rows with the bar at waist height or lower, you should start working on negative and assisted pull ups. Again, aim for at least 2-3 practice sessions per week, or even do 1 or 2 reps a few times per day to fast track your progress.
I’ve had the best success with pull ups by practicing very often. Get an inexpensive doorframe pull up bar and do just one pull up every time you walk past it. If you get into this habit, you could do 20 or 30 pull ups across the day. That will give you a head start in developing the right neural patterns and you’ll be able to build strength faster and more efficiently.
Remember, pull ups are tough but not impossible. Work on them persistently, use smart progressions, and you’ll be above the bar before you know it!
If You Need Help
My smart, strategic personal training programs can get you stronger and help you achieve your goals. Contact me to find out how!
To get started on your strength training journey right now, check out my Strength Training For Anxiety Program. It's a 12-week workout program, guided by an app so you can do the workouts anytime, anywhere. It also has unique features to improve your mental resilience as well as your physical strength.


